Recently I participated in a project where I needed to implement a use-case with calling someone on their phone where a machine tells them something. Fundamentally it’s a phone call with text-to-speech capabilities. There was no need to be able to talk back or select from a menu like in case of an IVR (Interactive Voice Response) system. Simply tell a message to a user via phone.
I explored a couple of options which are out there and I wanted to have a service that’s easy to use and by default integrated with a text-to-speech service.
I eventually chose AWS for the job. At the end of the article I’ll give you a little bit of evaluation of the service.
Anyway, so I chose AWS and within the wide range of services I went with AWS Connect. AWS Connect was very suitable because it’s a full-fledged contact center service. You can claim local phone numbers as well as toll free numbers. You can create an IVR, contact flows. Manage your phone calls in queues and so much more. I mean it’s way too much for my simple use-case but I wanted to give it a go since it’s fully integrated with the AWS text-to-speech service, AWS Polly.
AWS Polly is the service which turns – and I quote – “text into lifelike speech”. I didn’t have a real project experience with Polly until this point although once or twice I gave it a go before just for playing around and I liked it.
Since I won’t show you the exact code I wrote for this project, I’ll use another example. Imagine you have a 2-factor authentication set up for an app and you don’t want to use an authenticator or a text message (SMS) but you want to give a call to the user with the authentication code in the form of “The following is your authentication code: 1234”. Then the user can enter the code on a web UI and will be able to log in.
I hope the use-case is clear now so let’s do the dirty work and do the implementation step-by-step.
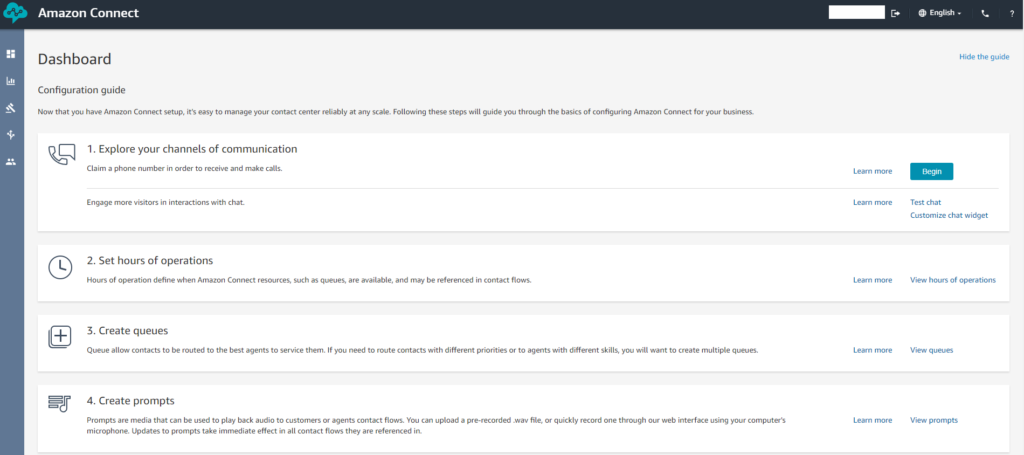
Creating the AWS Connect instance
Before doing any coding, we’ll have to set up an AWS Connect instance that’ll act as our call center.
Go to the AWS Console and open the AWS Connect service. You should see the welcome screen.
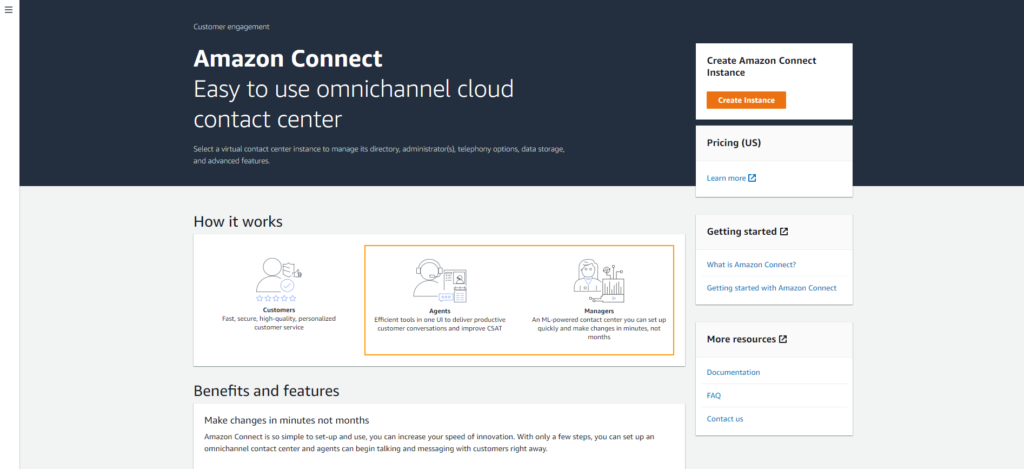
Click Create instance.
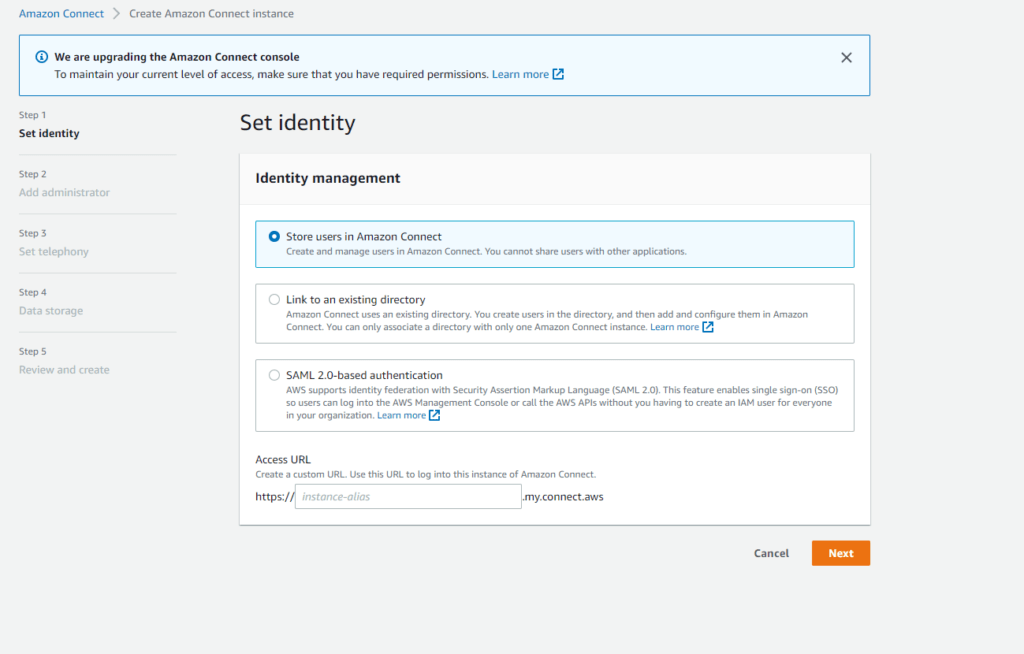
Here you have to decide where to store the users who can manage your instance, i.e. your call center. This doesn’t really apply to us right now for this simplistic use-case but in a nutshell, it’s like if you have operators who can take customer calls, this is the setting that configures where to store these operator users.
We’ll go with Store users in Amazon Connect for now.

Let’s specify an administrator. This is the user you can use to log in and manage your instance. Note the username and password, we’ll need those later on.
Click next.
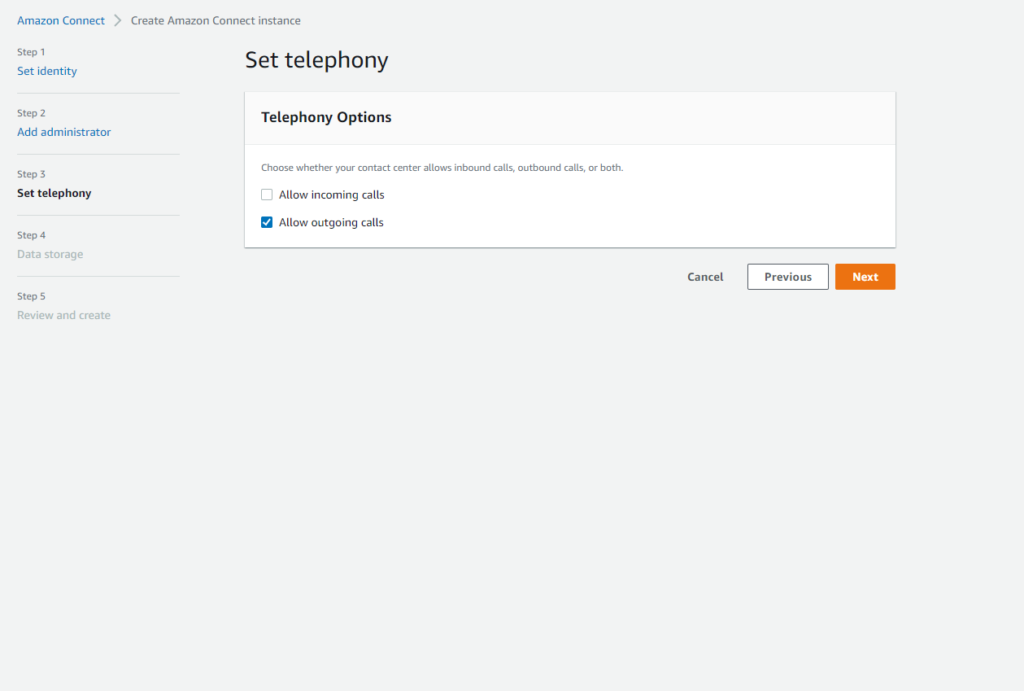
Select Allow outgoing calls.
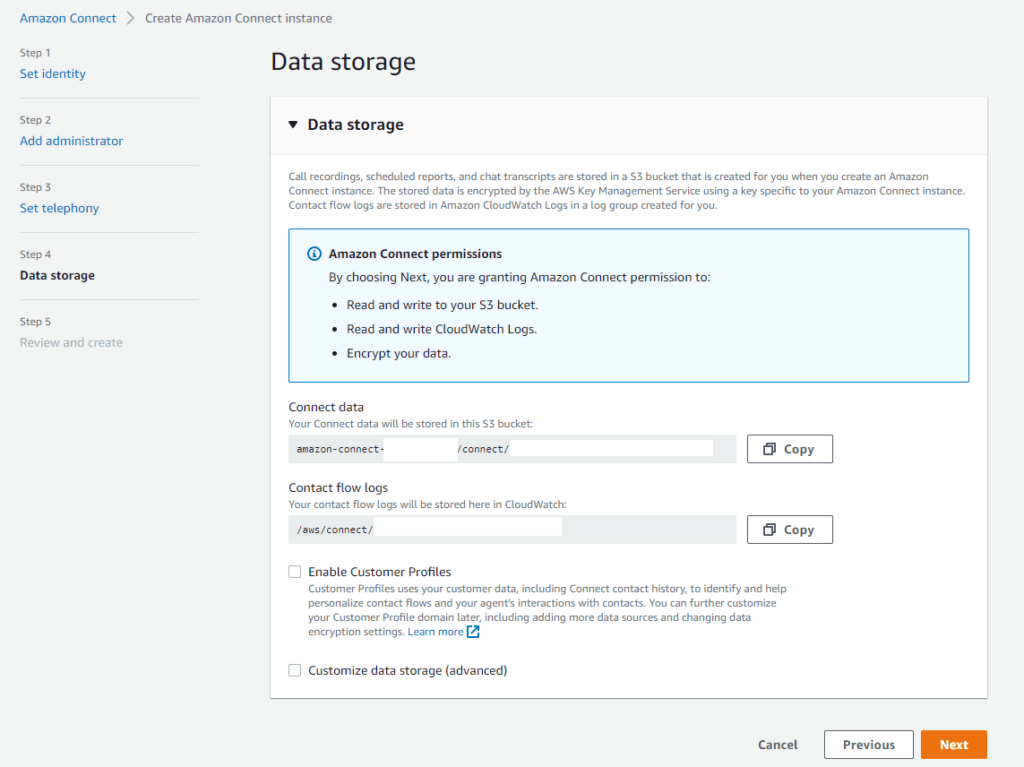
This is where you can configure how/where to store your instance data. Default should be good most of the cases, click Next.
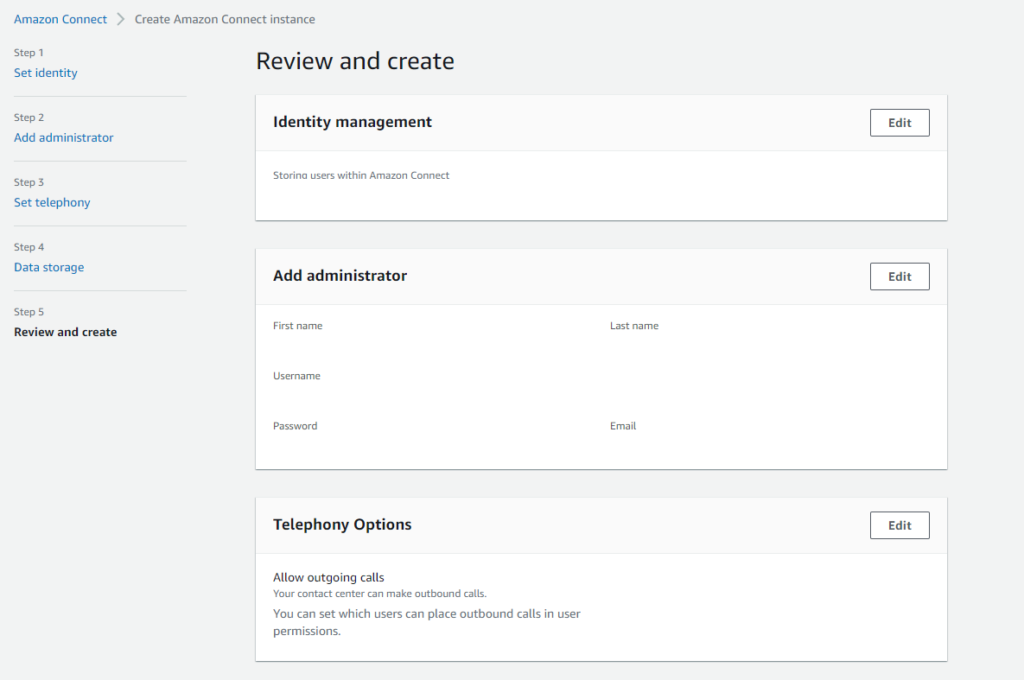
Review your settings (obviously I removed mine from the pic).
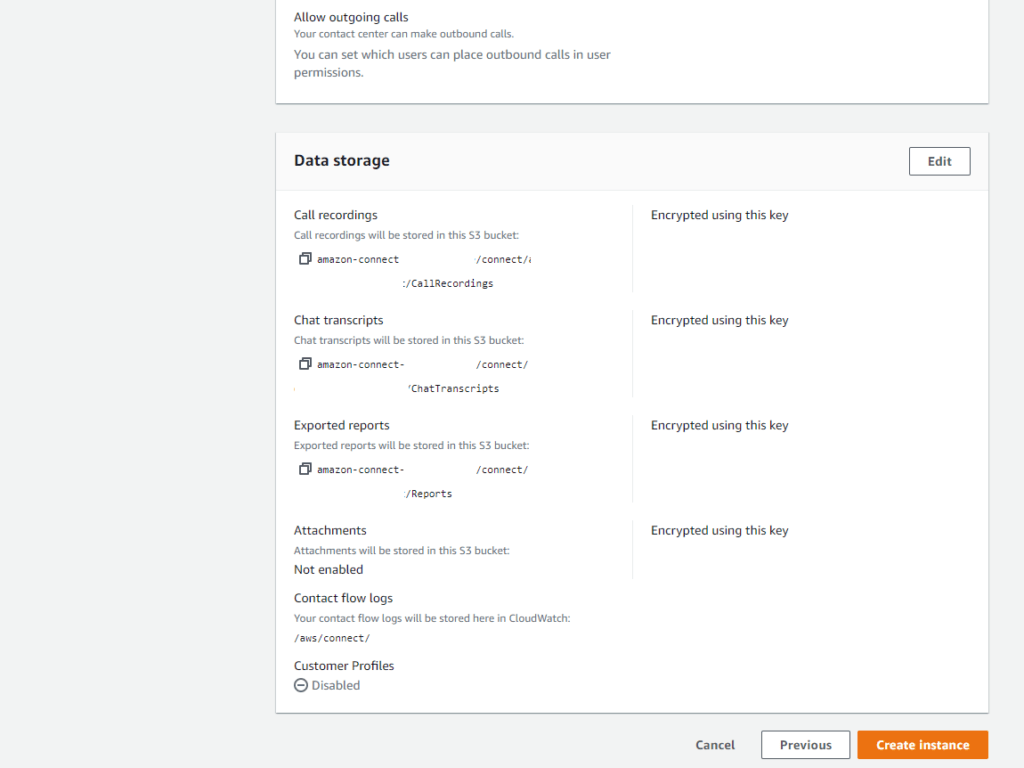
If everything is good, click Create instance.
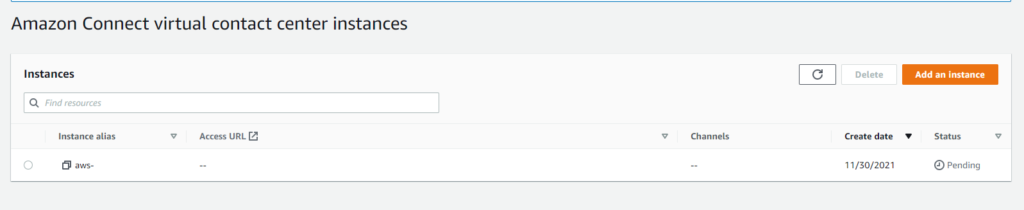
Your Connect instance is being created, it might take a couple minutes to complete. Let’s wait for that.

When done, the Access URL column will have a URL, that’s where you can manage your instance. Click on it.
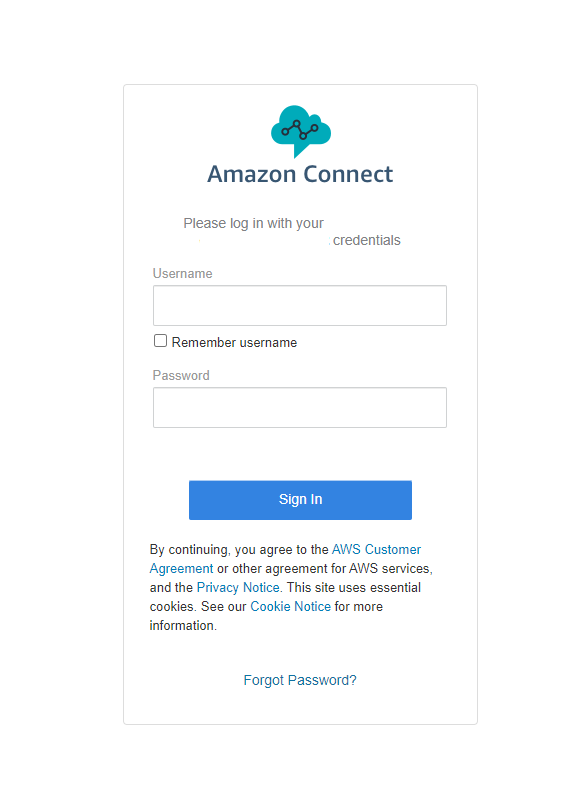
Log in with your administrator user you’ve created in the previous steps. Note, if you don’t know what was the user, don’t worry, you can still access the instance. Go back to the Connect instance list, click on your instance and there’ll be a link called Log in for emergency access. Click on that and it’ll automatically log you into your instance.
If logged in, you should see something like the screenshot above. Awesome.
Claiming your phone number
Next up, before we can do anything with the connect instance, we have to have a phone number.
Before proceeding, let’s talk about the 2 types of phone numbers AWS Connect supports.
- DID/DDI – Direct inward dialing/Direct dial-in numbers
- Toll-free numbers
I think you’ve met a toll-free number already. The concept is that it can be called free-of-charge by a customer.
A DID/DDI number is providing local phone numbers to an area.
Imagine there’s a customer in Seattle, Washington. The toll-free number is something like +1 (209) XXX-XXXX which is a California number. While a DID number is +1 (206) XXX-XXXX which is a local number prefix for Seattle, Washington.
What do you think, which call would the user more likely to answer? Well, that’s the point with DID, you can get a local number. You can read more about this in detail in the AWS docs.
Anyway, we’ll make outbound calls only so a DID number is more suitable for this use-case, so I’ll choose that one. Although I encountered situations in Hungary that a DID number was not available so I had to go with a toll-free number.
You could rightfully ask the question, what’s the big deal? Just choose whatever is available. And you’re partially right although the pricing of these 2 numbers are different.
Just for comparison, in Hungary, a DID number is $0.1/day while a toll-free number is $0.48 which is almost a 5x multiplier.
Let’s go back to claiming our phone number.
On the instance dashboard, click on Begin or in the left menu Routing -> Phone numbers.
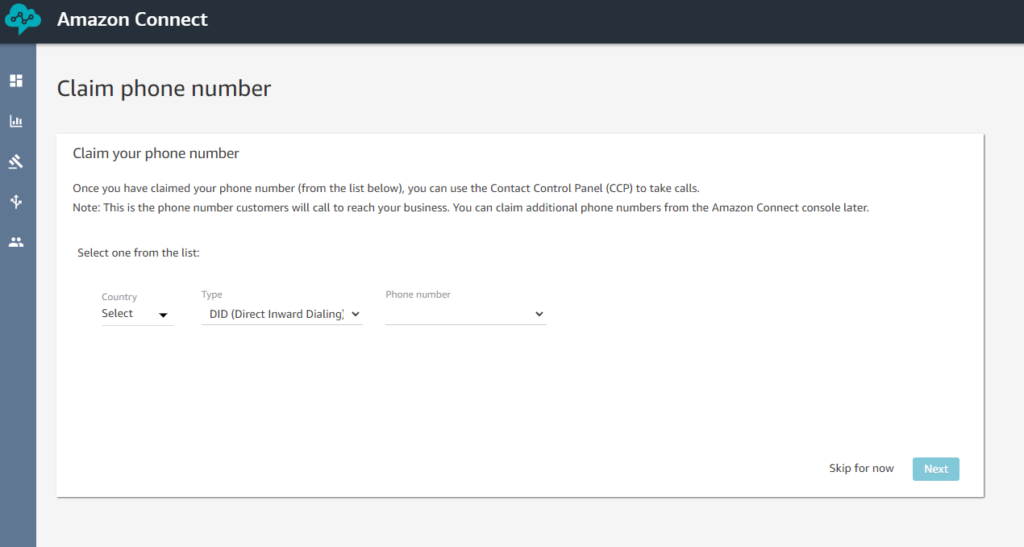
Here you have to choose the country you want to have your phone number from, whether it’s a toll-free or DID number. When you select the Country, it’ll load the Phone number list. If nothing is available under DID/toll-free, you can request new numbers from the AWS support. Click Next. You should have your phone number.
Configuring your phone number to your queue
Next up, we’ll configure a queue for our instance. This is where you could essentially put your customers while waiting for an agent if this is kind of like a customer service line. We won’t use it, but still we need to configure it.
Go to Routing -> Queues.
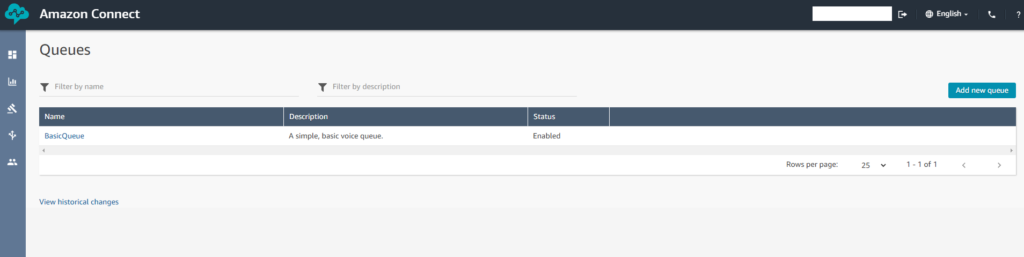
You should have a default queue already created called BasicQueue. Click on that.
Let’s associate the newly acquired phone number to the Queue.
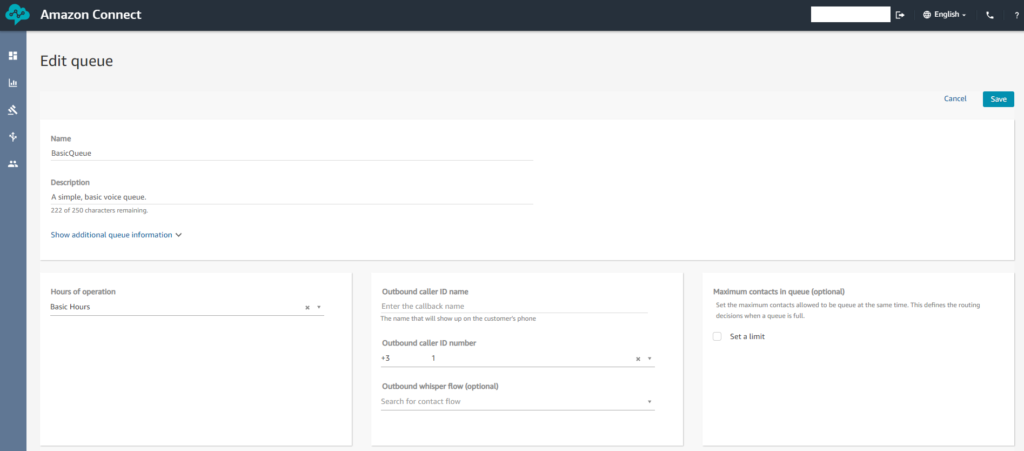
In the middle, there’s the Outbound caller ID number, you should set that.
Then, we have to get the queue ID and instance ID because we’ll need it to initiate the outbound call.
Click on Show additional queue information.
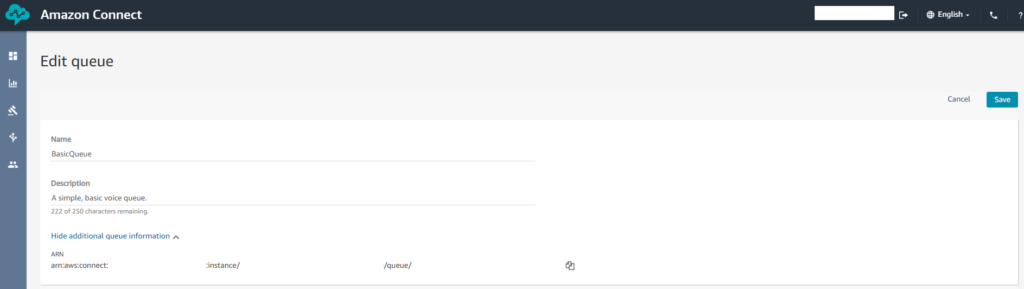
You’ll get an ARN in the form of arn:aws:connect:<region>:<account-id>:instance/<instance-id>/queue/<queue-id>.
Take a note of the <instance-id> and the <queue-id>.
Text-to-speech Contact Flow
Now we’ll create the contact flow that’ll do the text-to-speech conversion.
Go to Routing -> Contact flows.

Click on Create contact flow on the right hand side.
This is a visual editor of how we imagine a phone call flow. There are many-many options but we’ll keep it simple.
We’ll need 2 elements:
- Play prompt
- Disconnect
You can find the Play prompt item from the Interact list. Drag-and-drop it to the canvas. The Disconnect item is in the Terminate/Transfer list. Drag-and-drop it as well.
Now let’s connect them in the order of Start -> Play prompt -> Disconnect.
This’ll mean that the user will get the call. Then the prompt gets played – which will be the text-to-speech – and then we’ll simply disconnect the call.
It should look like this.
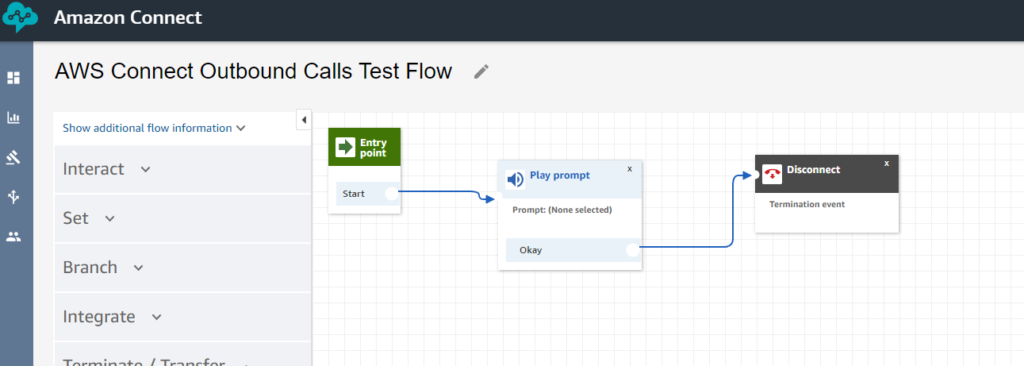
Alright, we’re almost done.
We still have to select what prompt we want to play. There are plenty of options again, I don’t want to cover all of them.
Click on the Play prompt item on the canvas and a menu will show up on the right. Select Text-to-speech or chat text. Select Enter dynamically. From the Type list select User Defined and the attribute name shall be promptText. Interpret as can stay with Text although if you want, you can use SSML too.
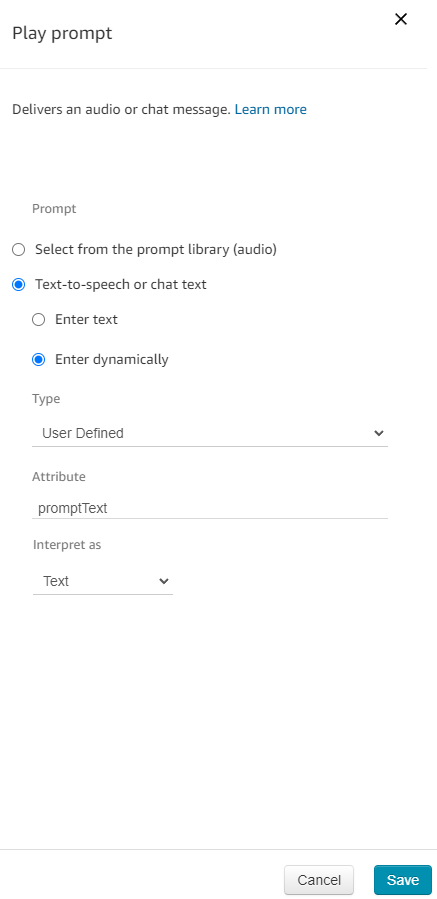
Click Save. Name your contact flow and then Save the whole thing and Publish it.
Now, let’s note the contact flow ID as well, just like we did for the queue.
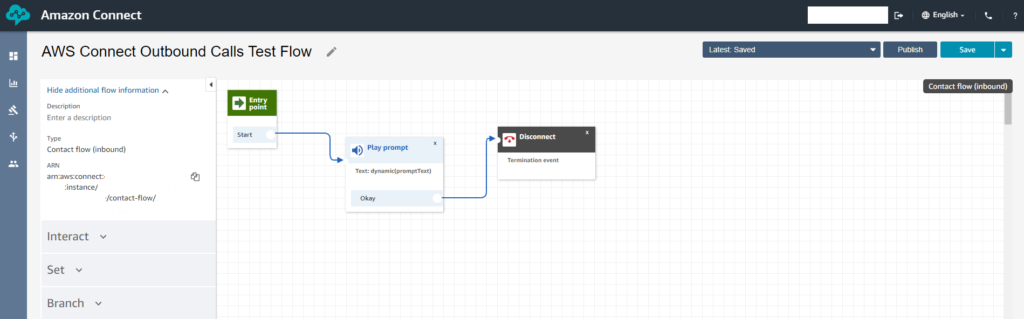
It’s in the form of arn:aws:connect:<region>:<account-id>:instance/<instance-id>/contact-flow/<contact-flow-id>.
That’s it, we’re done with the Connect instance configuration.
Coding the use-case
Let’s create a new project from start.spring.io. I’ll use Lombok and Spring Web as a dependency.
First, let’s create the example API. I’ll call it /call-auth-code.
@RestController
@RequiredArgsConstructor
public class AuthenticationCodeController {
    private final PhoneService phoneService;

    @PostMapping("/call-auth-code")
    public void callUserWithAuthCode() {
        String userPhoneNumber = "+12345678"; // User's phone number here to call
        int authCode = ThreadLocalRandom.current().nextInt(1_000, 10_000);
        phoneService.call(userPhoneNumber, "The following is your authentication code: " + authCode);
    }
}
The code will do the following. We have an example phone number that you should replace with the proper one, e.g. yours for testing. Then the code generates an authentication code which is 4 digits, between the 1000 (inclusive) and 10 000 (exclusive) range. And last it invokes the phoneService#call method. I’ll show you the implementation for that one in a second.
Before that, we’ll need a few configuration properties so let’s create a class for that.
@ConfigurationProperties("aws.connect")
@Data
public class AWSConnectConfigurationProperties {
    private String instanceId;
    private String contactFlowId;
    private String queueId;
}
Then go to the application.properties.
aws.connect.instanceId=<instance-id>
aws.connect.contactFlowId=<contact-flow-id>
aws.connect.queueId=<queue-id>
This is where you should look at your notes and copy the relevant ids.
Now let’s create a new configuration class to enable the ConfigurationProperties and configure an AWS Connect client.
@Configuration
@EnableConfigurationProperties(AWSConnectConfigurationProperties.class)
public class AWSConnectConfiguration {
    @Bean
    public ConnectClient connectClient(AWSConnectConfigurationProperties properties) {
        return ConnectClient.builder()
                .region(Region.EU_CENTRAL_1) // your region
                .build();
    }
}
Note that the region is set to eu-central-1 because I was playing with the service over there. For the ConnectClient and the relevant classes, we’ll need the AWS SDK, so let’s go to your pom.xml or build.gradle and add the following dependency (I have the latter).
dependencies {
	...
	implementation 'software.amazon.awssdk:connect:2.17.86'
        ...
}
Awesome, now the PhoneService class that the API is using.
@Component
@RequiredArgsConstructor
public class PhoneService {
    private final AWSConnectConfigurationProperties properties;
    private final ConnectClient connectClient;

    public void call(String number, String text) {
        StartOutboundVoiceContactRequest request = StartOutboundVoiceContactRequest.builder()
                .instanceId(properties.getInstanceId())
                .contactFlowId(properties.getContactFlowId())
                .queueId(properties.getQueueId())
                .destinationPhoneNumber(number)
                .attributes(Map.of("promptText", text))
                .build();

        connectClient.startOutboundVoiceContact(request);
    }
}
This is the basic implementation, but please keep in mind that now there’s no error handling, nothing. In a normal project, don’t forget those.
The code uses the startOutboundVoiceContact API from the SDK and it configures the proper request.
We’ll need 5 things on the request. The instance id, the contact flow id, the queue id, the destination phone number and the user defined attributes, namely the promptText attribute that we used for the text-to-speech setting in the contact flow.
Right now the calling phone number – which caller ID will appear on the callee’s phone – is selected automatically by the provided queue id since we configured the queue to have the single claimed phone number. If you wanna use a different phone number, you can do so by setting the sourcePhoneNumber attribute on the request.
That’s it, let’s test what we’ve done. Before starting up the service, somehow it should have access to the AWS Connect service, either via access keys/EC2 IAM roles/whatever you want. For simplicity I’m using AWS Access keys and configuring them via environment variables.
After you’ve created a new IAM user and enabled programmatic access, grant the AWS Connect related service permissions to the user. Again for simplicty I granted the AmazonConnect_FullAccess permission but you can be more restrictive for sure.
Then configure the keys via environment variables:
- AWS_ACCESS_KEY_ID
- AWS_SECRET_ACCESS_KEY
And I’ll use cURL to invoke the API.
$ curl -X POST http://localhost:8080/call-auth-code
If everything works, awesome, you’ll get the call from the claimed phone number and Polly will say The following is your authentication code: 1234, if not, let’s continue with a few hiccups I encountered during the testing of the service.
First hiccup – InvalidParameterException
software.amazon.awssdk.services.connect.model.InvalidParameterException: DestinationPhoneNumber not in E164 format (Service: Connect, Status Code: 400, Request ID: ..., Extended Request ID: null)
	at software.amazon.awssdk.core.internal.http.CombinedResponseHandler.handleErrorResponse(CombinedResponseHandler.java:123) ~[sdk-core-2.17.86.jar:na]
	...
	at org.apache.tomcat.util.threads.ThreadPoolExecutor$Worker.run(ThreadPoolExecutor.java:659) ~[tomcat-embed-core-9.0.55.jar:9.0.55]
	at org.apache.tomcat.util.threads.TaskThread$WrappingRunnable.run(TaskThread.java:61) ~[tomcat-embed-core-9.0.55.jar:9.0.55]
	at java.base/java.lang.Thread.run(Thread.java:829) ~[na:na]
If you got the exception above, it means that the phone number you provided as a destination number is not in E.164 format.
The format looks the following: +[country code][phone number including area code]. So for example this could happen if you missed the plus (+) sign from the beginning.
Second hiccup – ResourceNotFoundException
software.amazon.awssdk.services.connect.model.ResourceNotFoundException: No resource found with provided value for the parameter: ContactFlowId (Service: Connect, Status Code: 404, Request ID: ..., Extended Request ID: null)
	at software.amazon.awssdk.core.internal.http.CombinedResponseHandler.handleErrorResponse(CombinedResponseHandler.java:123) ~[sdk-core-2.17.86.jar:na]
	at software.amazon.awssdk.core.internal.http.CombinedResponseHandler.handleResponse(CombinedResponseHandler.java:79) ~[sdk-core-2.17.86.jar:na]
	...
	at org.apache.tomcat.util.threads.TaskThread$WrappingRunnable.run(TaskThread.java:61) ~[tomcat-embed-core-9.0.55.jar:9.0.55]
	at java.base/java.lang.Thread.run(Thread.java:829) ~[na:na]
This could happen due to a number of reasons. One, the most obvious one if you have provided the wrong contact flow id in the request.
Another, less obvious one is if you passed the proper contact flow id, but you forgot to press the Publish button on the contact flow. If this is the case, go back to the contact flow editor and press the Publish button next to Save.
Retry, and now you should be good to go.
Third hiccup – DestinationNotAllowedException
software.amazon.awssdk.services.connect.model.DestinationNotAllowedException: null (Service: Connect, Status Code: 403, Request ID: ..., Extended Request ID: null)
	...
	at org.apache.tomcat.util.threads.ThreadPoolExecutor$Worker.run(ThreadPoolExecutor.java:659) ~[tomcat-embed-core-9.0.55.jar:9.0.55]
	at org.apache.tomcat.util.threads.TaskThread$WrappingRunnable.run(TaskThread.java:61) ~[tomcat-embed-core-9.0.55.jar:9.0.55]
	at java.base/java.lang.Thread.run(Thread.java:829) ~[na:na]
The trickiest one in my opinion because it’s really not clear why this is happening. Let me share my case with you. I’m living in Hungary so I took a hungarian DID number. I tried to call a hungarian phone number and the exception showed up.
I looked at the API docs from AWS to figure out what’s going on, but as usual, the API docs are not that detailed. Let me copy it:
DestinationNotAllowedException
Outbound calls to the destination number are not allowed.

HTTP Status Code: 403
Anyway, I did some googleing as well cause what else a developer could do, right? 🙂
I found out this COULD indicate that you cannot call that phone number from your Connect instance and people encountered it when doing international calls.
I was still confused because I wasn’t trying to do international calls. Hungary-Hungary doesn’t look like international to me but who am I to judge?
I looked and looked and after some time I found this piece in the AWS docs hidden: Countries you can call.
My test instance was created in eu-central-1 (Frankfurt). Going forward in the docs.
Instances created in EU (Frankfurt) and EU (London)
You can call the following countries by default:
- United Kingdom: See Prefixes that are not allowed by default
- Italy
- France
- Ireland
- United States
After that it became clear that I cannot call hungarian numbers by default. I have to submit a service quota increase request.
So, in case you’re in the same shoes and see this exception, check this list for your region and if the target country is not on the list, make sure to submit a support request. I’ve done it 3 times now for different testing scenarios and they usually go through within 1-2 business days.
Limitations & Summary
I think AWS Connect is a really great service to start with and it’s literally minimal configuration to integrate with AWS Polly to do text-to-speech.
2 limitations I have encountered so far with the service.
The first one is the available languages for Polly. I wanted to do hungarian text-to-speech (and yeah I know hungarian is a difficult language) and it doesn’t support it, yet.
The second one, and it’s related to making a workaround for the first one. Since the GCP text-to-speech service supports hungarian, I was thinking maybe I could do the text-to-speech with GCP, get back the audio as an mp3 file and use that as a basis for AWS Connect, eliminating AWS Polly from the picture.
And you can totally do it because you can upload static prompts for AWS connect which are just audio files and you can select dynamically which prompt you want to use in your contact flow.
So far so good, but then I dynamically have to upload prompts as soon as the GCP text-to-speech is done. I found out that there’s no API for uploading prompts. You can only do it via the UI.
That’s it, I hope you liked this little journey. Eventually I went with another combination of services instead of AWS, but it was a good experience to try it out.
If you liked it, follow me for more on Facebook and Twitter. As usual, the code can be found on GitHub.