Kubernetes on Oracle Cloud

This is going to be the last piece of the Free Kubernetes on Oracle Cloud series. We’ve checked a lot of things like how it’s possible to run a completely free 4 node Kubernetes cluster on Oracle Cloud, how to build this whole thing using Terraform and how to expose applications to the external world.
There’s one piece left out so far. Since the cluster consists of ARM compute nodes, we need some way to build ARM compatible docker images in order to run something on the cluster.
Today, that’s what we’re gonna check in addition to creating a free private docker repository on Oracle Cloud as well as setting up a free CICD pipeline for your app using GitHub Actions.
Building a custom application
First of all to simulate a real app, we need something to build a docker image from. In the last article I used an nginx image which is by default compatible with many architectures. For the base, I’ll use the same nginx image but we’ll create a custom index.html page to show that it’s really ours.
With the folder structure in mind from the previous articles, let’s create a directory called app. In that, let’s create an index.html which will be our custom page that nginx will display by default.
You can put whatever content you want into the index.html file but here’s what I used:
<!DOCTYPE html>
<html>
    <head>
        <title>Free Kubernetes</title>
    </head>
    <body>
        <h1>This is a custom page running on a Free Kubernetes cluster on Oracle Cloud</h1>
        <h1>Also, there's a free CICD pipeline included using GitHub Actions</h1>
    </body>
</html>
Next up, we’ll need a Dockerfile in the same app folder. Trust me it’s gonna be real easy. Of course in a real-life scenario it could be very complicated but that’s not the point of the article, so here we go.
Dockerfile:
FROM nginx:latest
COPY index.html /usr/share/nginx/html/index.html
That’s it. We start from the latest nginx image and we copy over the index.html file we created into the right folder.
Now, let’s build the image locally using Docker CLI:
$ docker build -t free-kubernetes-nginx .
Then let’s start the image we created to verify that it really works:
$ docker run -p 80:80 free-kubernetes-nginx
And then open localhost in your favorite browser. The result should be similar to this:

Awesome. The Docker image can be built now.
Free private Docker registry
The next thing we wanna do is to create a free private Docker registry. You can for sure put everything into public registries but if you need to, you can also do it privately on Oracle Cloud.
Let’s create the registry using Terraform. Open the oci-infra/infra.tf file from the previous article and add the following:
// ...previous things are omitted for simplicity

resource "oci_artifacts_container_repository" "docker_repository" {
  compartment_id = var.compartment_id
  display_name   = "free-kubernetes-nginx"

  is_immutable = false
  is_public    = false
}
Then a quick terraform apply and your registry is ready to go.
Let’s grab the username and password for the private registry.
The URL for the private registry can be found here: Availability by Region. The URL solely depends on which region you put the docker registry in. In my case, it’s eu-frankfurt-1 so my URL is gonna be fra.ocir.io.
The next thing is the username. It’s gonna consist of 2 things. The tenancy’s Object Storage Namespace and the user that has the permissions to access the Docker registry in the account.
The tenancy’s Object Storage Namespace can be found on the Tenancy’s page:
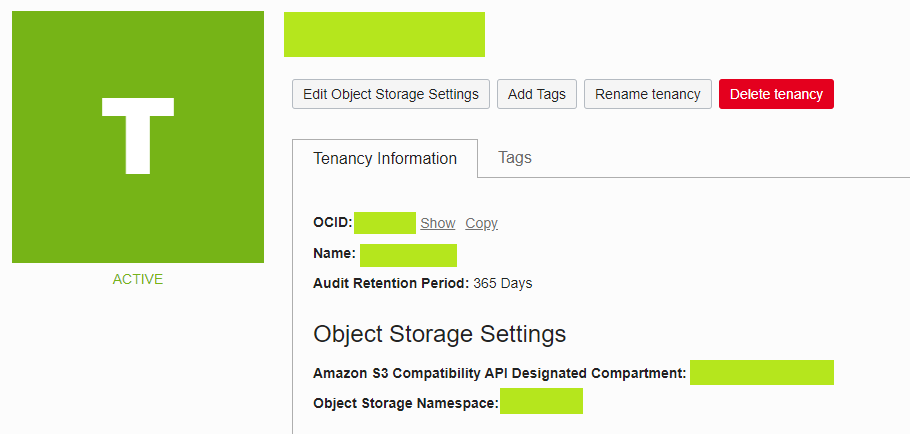
And at the bottom, you can find the Object Storage Namespace, it’s gonna be some random string.
Next, we should get the name of the user we’re planning to use for interacting with the docker registry. Go to Identity/Users and choose from the available users or create a new one if you wish but don’t forget to add the neessary permissions to access the registry.
The username for the registry comes together from those 2 in the form of <object-storage-namespace>/<username> so for example it could be abcdefgh/test123.
The last thing we need to do is to generate a password for programmatic authentication, so let’s go to the user’s details on the cloud console and select Auth Tokens from the left.
Click on Generate token and at the end you’ll get a password, save that.
To test the whole thing, open a terminal window and type the following:
$ docker login -u <object-storage-namespace>/<username> <docker server>
This will prompt you for the password you generated on the Auth Tokens page. If everything is set up correctly, you should see the Login succeeded message.
Note: it might take a minute for the auth token to become active so give it some time if you see Unauthorized messages from docker login.
Alright, now we need to make the docker access available to the Kubernetes cluster so it can download images from this private registry.
Open up your terminal window and do the following:
$ kubectl -n <namespace> create secret docker-registry free-registry-secret --docker-server=<docker-server> --docker-username='<object-storage-namespace>/<username>' --docker-password='<password>'
secret/free-registry-secret created
This will create a secret named free-registry-secret which will be the docker access for that particular namespace to our registry.
Automatic building and deployment
Now let’s change up the deployment. We had a default nginx deployed to the cluster already so let’s remove it first. Go to k8s-infra/k8s-cluster.tf and remove the following deployment:
resource "kubernetes_deployment" "nginx_deployment" {
  metadata {
    name = "nginx"
    labels = {
      app = "nginx"
    }
    namespace = kubernetes_namespace.free_namespace.id
  }

  spec {
    replicas = 1

    selector {
      match_labels = {
        app = "nginx"
      }
    }

    template {
      metadata {
        labels = {
          app = "nginx"
        }
      }

      spec {
        container {
          image = "nginx"
          name  = "nginx"
          port {
            container_port = 80
          }
        }
      }
    }
  }
}
We won’t need this within the Terraform script. Let’s do a terraform apply to remove the deployment from the cluster.
However, let’s create a k8s-deployment.yaml file in the app folder, next to the Dockerfile.
The content will be more or less identical what we’ve done in the Terraform script although in a different format:
apiVersion: apps/v1
kind: Deployment
metadata:
  name: nginx
  labels:
    app: nginx
spec:
  replicas: 1
  selector:
    matchLabels:
      app: nginx
  template:
    metadata:
      labels:
        app: nginx
    spec:
      containers:
        - name: nginx
          image: fra.ocir.io/<DOCKER_OBJECT_STORAGE_NAMESPACE>/free-kubernetes-nginx:latest
          ports:
            - containerPort: 80
      imagePullSecrets:
      - name: free-registry-secret
So the image should be referred as seen above. <docker-server>/<object-storage-namspace>/<image name>:<image tag>
Replace fra.ocir.io from the file above to your proper region relevant Docker registry. Leave the <DOCKER_OBJECT_STORAGE_NAMESPACE> because we’re gonna replace that on the fly in the GitHub workflow.
Alright, the next thing we should do is to create the GitHub Action to deploy the app to the cluster upon pushing to the Git repository.
Create the file .github/workflows/cicd.yaml with the following content:
name: CI/CD

on:
  push:
    branches:
      - master
    paths:
      - app/**
  workflow_dispatch:

jobs:
  build:
    runs-on: ubuntu-latest
    steps:
      - name: Checkout
        uses: actions/checkout@v2

      - name: Set up QEMU
        uses: docker/setup-qemu-action@v1

      - name: Set up Docker Buildx
        id: buildx
        uses: docker/setup-buildx-action@v1
        with:
          install: true
      - name: 'Install OCI CLI'
        run: |
          mkdir ~/.oci
          echo "${{ secrets.OCI_CONFIG }}" > ~/.oci/config
          echo "${{ secrets.OCI_KEY_FILE }}" > ~/.oci/key.pem
          curl -L -O https://raw.githubusercontent.com/oracle/oci-cli/master/scripts/install/install.sh
          chmod +x install.sh
          ./install.sh --accept-all-defaults
          echo "/home/runner/bin" >> $GITHUB_PATH
          exec -l $SHELL
          oci setup repair-file-permissions --file /home/runner/.oci/config
          oci setup repair-file-permissions --file /home/runner/.oci/key.pem
      - name: 'Install kubectl'
        run: |
          mkdir /tmp/.kube
          curl -L -O "https://dl.k8s.io/release/v1.22.4/bin/linux/amd64/kubectl" -o kubectl
          chmod +x kubectl
          mv kubectl /usr/local/bin
          echo "${{ secrets.KUBECONFIG }}" > /tmp/.kube/config
          echo "KUBECONFIG=/tmp/.kube/config" >> $GITHUB_ENV
      - name: 'Currently running services'
        run: kubectl -n free-ns get pods
      - name: Login to Docker registry
        uses: docker/login-action@v1
        with:
          registry: ${{ secrets.DOCKER_URL }}
          username: ${{ secrets.DOCKER_USERNAME }}
          password: ${{ secrets.DOCKER_PASSWORD }}
      - name: Available platforms
        run: echo ${{ steps.buildx.outputs.platforms }}
      - name: Build
        run: |
          docker build --push --platform linux/amd64,linux/arm64 -t ${{ secrets.DOCKER_URL }}/${{ secrets.DOCKER_OBJECT_STORAGE_NAMESPACE }}/free-kubernetes-nginx:latest app/.
      - name: Deploy to K8S
        run: |
          sed -i 's/<DOCKER_OBJECT_STORAGE_NAMESPACE>/${{ secrets.DOCKER_OBJECT_STORAGE_NAMESPACE }}/g' app/k8s-deployment.yaml
          kubectl -n free-ns apply -f app/k8s-deployment.yaml
      - name: Restart nginx
        run: |
          kubectl -n free-ns rollout restart deployment nginx
This is the workflow definition which will trigger every time anything gets changed in the app folder and on the master branch.
Let me sum up the steps:
- Git checkout
- QEMU setup
- Docker Buildx setup
- Installing OCI CLI
- Installing kubectl
- Verifying if kubectl is configured by listing all pods
- Authenticate to Docker registry
- Logging all the available platforms we can build Docker images for
- Building and uploading the image
- Applying the Kubernetes deployment file
- Restarting the deployment
So the important steps here for this specific Kubernetes cluster come from the fact that it’s running on ARM compute instances. Step 2 and 3 are very important for this process. QEMU is a system emulator which we’ll use to emulate the ARM architecture. Docker Buildx is an extension to the regular Docker CLI with for example support to build against multiple architectures, like ARM. In short, QEMU is the emulator for ARM and Docker Buildx is the tool to utilize the emulated ARM architecture and build the image against it.
The rest is very straightforward. The platform the Docker image is built against is configured at step 9 with the --platform parameter.
Let’s talk about build secrets. The following are needed:
- OCI_CONFIG
- OCI_KEY_FILE
- KUBECONFIG
- DOCKER_URL
- DOCKER_USERNAME
- DOCKER_PASSWORD
- DOCKER_OBJECT_STORAGE_NAMESPACE
You can configure the secrets on the Settings page of your Git repo. The OCI_CONFIG parameter is the ~/.oci/config file on your computer. It’s the configuration file for OCI CLI. Just copy paste the content into the secret. Also, what you should really look out for is the key_file property. It should point to ~/.oci/key.pem because that’s what’s in the pipeline file. If that’s not suitable for you, make sure to change it in the pipeline too.
The OCI_KEY_FILE secret is the private key for accessing the Oracle Cloud account.
KUBECONFIG is the ~/.kube/free-k8s-config file, storing the authentication configuration for the Kubernetes cluster used for kubectl.
DOCKER_URL, DOCKER_USERNAME, DOCKER_PASSWORD, DOCKER_OBJECT_STORAGE_NAMESPACE is straightforward I guess. Bear in mind, DOCKER_USERNAME is the concatenated username with the Object Storage Namespace, so the value should be in the form of abcde/test123.
And then, push everything to your GitHub repo and the pipeline will kick off. If everything succeeded, you should be able to see the custom HTML page we made at the beginning on the IP address of the Network Load Balancer.
Summary
That’s it. From now on the pipeline will work like magic. Whenever you push to the app folder, it’ll build the Docker image for ARM and deploy it to your Kubernetes cluster on Oracle Cloud.
It’s definitely not a full fledged CICD, rather it’s the most simplistic version of it but it wasn’t the point of this article to create a complicated one.
The full code/everything can be found on GitHub. Check it out.
Hope you liked the series and if you did, follow me on Twitter and/or Facebook, plus make sure you share it with your friends who might be interested.
This is a great series to get K8s up and running in Oracle for free, many thanks for this. I did, however, struggle to get the node pool up with Terraform – I kept getting some host capacity error. When I created the node pool inside the OCI portal, I managed to get 2 nodes up (I couldn’t get 3, again due to lack of host capacity). As a result, I had to use `terraform import` to bring the node pool into my Terraform state file.
The GitHub workflow can be simplified using a few actions instead of copying in private keys into secrets etc. – for example:
name: App
on:
push:
branches:
– master
paths:
– app/**
workflow_dispatch:
env:
OCI_CLI_USER: ${{ secrets.OCI_CLI_USER }}
OCI_CLI_TENANCY: ${{ secrets.OCI_CLI_TENANCY }}
OCI_CLI_FINGERPRINT: ${{ secrets.OCI_CLI_FINGERPRINT }}
OCI_CLI_KEY_CONTENT: ${{ secrets.OCI_CLI_KEY_CONTENT }}
OCI_CLI_REGION: ${{ secrets.OCI_CLI_REGION }}
jobs:
build:
name: Build
runs-on: ubuntu-latest
steps:
– name: Checkout
uses: actions/checkout@v2
– name: Set up QEMU
uses: docker/setup-qemu-action@v1
– name: Set up Docker Buildx
uses: docker/setup-buildx-action@v2
– name: Log into Container Registry
uses: oracle-actions/login-ocir@v1.1
with:
auth_token: ${{ secrets.OCI_AUTH_TOKEN }}
– name: Build and push
uses: docker/build-push-action@v3
with:
push: true
tags: lhr.ocir.io//free-kubernetes-nginx:${{ github.run_number }}
context: app/.
platforms: linux/amd64,linux/arm64
deploy:
name: Deploy
needs: build
runs-on: ubuntu-latest
steps:
– name: Checkout
uses: actions/checkout@v2
– name: Configure Kubectl
uses: oracle-actions/configure-kubectl-oke@v1.1
with:
cluster: ${{ secrets.OKE_CLUSTER_OCID }}
– name: Deploy to K8s
uses: Azure/k8s-deploy@v3.1
with:
strategy: basic
namespace:
annotate-namespace: false
pull-images: false
manifests: |
app/
images: lhr.ocir.io//free-kubernetes-nginx:${{ github.run_number }}
– name: Restart nginx
run: |
kubectl -n rollout restart deployment nginx
My previous post had text in angle brackets removed:
* “lhr.ocir.io//free-kubernetes-nginx” should have read ” lhr.ocir.io/storage-namespace/free-kubernetes-nginx”
* “namespace:” and “kubectl -n” should have been followed with “k8s-namespace”
This part did not work for me:
docker login -u /
I found on internet this work-around adding this prefix “/oracleidentitycloudservice/” between namespace/username
docker -u /oracleidentitycloudservice/