Kubernetes on Oracle Cloud

Last time we finished the infrastructure setup for the free Kubernetes cluster running on Oracle Cloud. Now I’ll show you how to expose your apps for free using Network Load Balancers.
In the previous article, we finished at configuring kubectl to work with the remote Kubernetes cluster: Free Oracle Cloud Kubernetes cluster with Terraform
Preparing for deployment
After you have the cluster ready from the previous article, let’s create a custom namespace where the application will reside. We could totally do this manually using kubectl but we have Terraform.
Next to the oci-infra folder, let’s create a new k8s-infra folder. We’ll need 3 Terraform files here too: k8s-cluster.tf, outputs.tf and a variables.tf.
We’ll need a couple OCIDs from the oci-infra Terraform script so let’s adjust the outputs.tf there.
oci-infra/outputs.tf:
output "k8s-cluster-id" {
  value = oci_containerengine_cluster.k8s_cluster.id
}

output "public_subnet_id" {
  value = oci_core_subnet.vcn_public_subnet.id
}

output "node_pool_id" {
  value = oci_containerengine_node_pool.k8s_node_pool.id
}
Then do a terraform apply in the oci-infra folder to get the updated outputs.
Now let’s edit the k8s-infra/variables.tf:
variable "compartment_id" {
  type        = string
  description = "The compartment to create the resources in"
}

variable "region" {
  type        = string
  description = "The region to provision the resources in"
}

variable "public_subnet_id" {
  type = string
  description = "The public subnet's OCID"
}

variable "node_pool_id" {
  type = string
  description = "The OCID of the Node Pool where the compute instances reside"
}
Same deal, let’s configure them using the environment variable approach.
$ export TF_VAR_compartment_id=<your compartment ocid>
$ export TF_VAR_region=<your region>
$ export TF_VAR_public_subnet_id=<your public subnet's ocid>
$ export TF_VAR_node_pool_id=<your node pool's ocid>
Then let’s go to k8s-cluster.tf in the k8s-infra folder.
provider "kubernetes" {
  config_path = "~/.kube/free-k8s-config"
}

provider "oci" {
  region = var.region
}

resource "kubernetes_namespace" "free_namespace" {
  metadata {
    name = "free-ns"
  }
}
A quick terraform init and then aterraform apply will create the namespace in the cluster.
Deploying an example app
As an example, I’ll use an nginx container instead of writing our own, so let’s extend the k8s-cluster.tf file:
// ...previous things are omitted for simplicity

resource "kubernetes_deployment" "nginx_deployment" {
  metadata {
    name = "nginx"
    labels = {
      app = "nginx"
    }
    namespace = kubernetes_namespace.free_namespace.id
  }

  spec {
    replicas = 1

    selector {
      match_labels = {
        app = "nginx"
      }
    }

    template {
      metadata {
        labels = {
          app = "nginx"
        }
      }

      spec {
        container {
          image = "nginx"
          name  = "nginx"
          port {
            container_port = 80
          }
        }
      }
    }
  }
}
This will create a new Deployment on the cluster in the namespace we created. We expose port 80 from the container. Awesome.
We still need to expose the app to the outside of the cluster. We’ll need a Service resource as well that maps to the pods.
Let’s do a terraform apply to deploy nginx and then let’s see if it’s really deployed:
$ kubectl -n free-ns get pods
NAME                     READY   STATUS    RESTARTS   AGE
nginx-7b544fd4c8-4ftg8   1/1     Running   0          33s
Exposing the app
There are 2 very convenient ways to expose the app in this environment.
Either we’ll use an Oracle Cloud managed Load Balancer which has an hourly flat rate of $0.0113. That’s the easiest way to do it however you’ll have to pay some money for it. In that case, you need to use a LoadBalancer Kubernetes Service instead of what we’re about to create (NodePort).
The other approach is to use a Network Load Balancer which the Oracle Container Engine doesn’t support natively, meaning that if for example nodes are added/removed, you have to adjust the Network Load Balancer configuration because the Oracle Cloud will not do it for you automatically. On the other hand, a Network Load Balancer is free of charge.
So let’s go with a Network Load Balancer. First, we need to expose the service on all worker nodes to be available on a specific port because that’s the entry point we’ll use for the NLB. For this, we’ll need a NodePort Kubernetes Service which does exactly that.
// ...previous things are omitted for simplicity

resource "kubernetes_service" "nginx_service" {
  metadata {
    name      = "nginx-service"
    namespace = kubernetes_namespace.free_namespace.id
  }
  spec {
    selector = {
      app = "nginx"
    }
    port {
      port        = 80
      target_port = 80
      node_port   = 31600
    }

    type = "NodePort"
  }
}
If we do a terraform apply now, nginx will be available on all worker nodes on port 31600.
Note: here I ran into an issue when having multiple nodes in the cluster that the service was only available on the node that was running the pod. Turns out it was due to the fact that it’s mandatory to allow communication in the worker node subnet on ALL protocols. And the emphasis on the ALL. TCP is not enough. We’ve originally created the private subnet’s security list in a way that allows all protocol traffic so we’re good. If you change it to TCP to restrict it, NodePort won’t work.
Awesome, the app is exposed from the cluster.
Creating the free Network Load Balancer
Even though the app is exposed, we still can’t access it since we need to adjust the network configuration.
Let’s go back to the oci-infra/infra.tf file and adjust the private_subnet_sl resource:
resource "oci_core_security_list" "private_subnet_sl" {
  compartment_id = var.compartment_id
  vcn_id         = module.vcn.vcn_id

  display_name = "free-k8s-private-subnet-sl"

  egress_security_rules {
    stateless        = false
    destination      = "0.0.0.0/0"
    destination_type = "CIDR_BLOCK"
    protocol         = "all"
  }

  ingress_security_rules {
    stateless   = false
    source      = "10.0.0.0/16"
    source_type = "CIDR_BLOCK"
    protocol    = "all"
  }

  ingress_security_rules {
    stateless   = false
    source      = "10.0.0.0/24"
    source_type = "CIDR_BLOCK"
    protocol    = "6"
    tcp_options {
      min = 10256
      max = 10256
    }
  }

  ingress_security_rules {
    stateless   = false
    source      = "10.0.0.0/24"
    source_type = "CIDR_BLOCK"
    protocol    = "6"
    tcp_options {
      min = 31600
      max = 31600
    }
  }
}
I added the last 2 rules, for port 10256 and port 31600. I think the latter is obvious, that’s the NodePort we configured previously for the app.
The 10256 could be questionable but there’s a reason. That’s what we’ll use for health checking the cluster from the Network Load Balancer. Kubernetes serves the healthz API response on that port hence we need to allow it.
Let’s adjust the public_subnet_sl resource as well:
resource "oci_core_security_list" "public_subnet_sl" {
  compartment_id = var.compartment_id
  vcn_id         = module.vcn.vcn_id

  display_name = "free-k8s-public-subnet-sl"

  egress_security_rules {
    stateless        = false
    destination      = "0.0.0.0/0"
    destination_type = "CIDR_BLOCK"
    protocol         = "all"
  }

  egress_security_rules {
    stateless        = false
    destination      = "10.0.1.0/24"
    destination_type = "CIDR_BLOCK"
    protocol         = "6"
    tcp_options {
      min = 31600
      max = 31600
    }
  }

  egress_security_rules {
    stateless        = false
    destination      = "10.0.1.0/24"
    destination_type = "CIDR_BLOCK"
    protocol         = "6"
    tcp_options {
      min = 10256
      max = 10256
    }
  }

  ingress_security_rules {
    protocol    = "6"
    source      = "0.0.0.0/0"
    source_type = "CIDR_BLOCK"
    stateless   = false

    tcp_options {
      max = 80
      min = 80
    }
  }

  ingress_security_rules {
    stateless   = false
    source      = "10.0.0.0/16"
    source_type = "CIDR_BLOCK"
    protocol    = "all"
  }

  ingress_security_rules {
    stateless   = false
    source      = "0.0.0.0/0"
    source_type = "CIDR_BLOCK"
    protocol    = "6"
    tcp_options {
      min = 6443
      max = 6443
    }
  }
}
Same deal here, just the other way around. I added 2 egress rules for port 10256 and port 31600. Also, I added an ingress rule for port 80 so that the load balancer can communicate with the public subnet.
Quick terraform apply and we’re set.
Great. Let’s go back to the k8s-infra/k8s-cluster.tf file and add the free Network Load Balancer to route the traffic into the cluster.
// ...previous things are omitted for simplicity

data "oci_containerengine_node_pool" "free_k8s_np" {
  node_pool_id = var.node_pool_id
}

locals {
  active_nodes = [for node in data.oci_containerengine_node_pool.free_k8s_np.nodes : node if node.state == "ACTIVE"]
}
This will first load the Node Pool that we’ve created and will filter out non-active nodes. This is key because the NLB have to point to the active Nodes.
Then the free Network Load Balancer:
// ...previous things are omitted for simplicity

resource "oci_network_load_balancer_network_load_balancer" "free_nlb" {
  compartment_id = var.compartment_id
  display_name   = "free-k8s-nlb"
  subnet_id      = var.public_subnet_id

  is_private                     = false
  is_preserve_source_destination = false
}

resource "oci_network_load_balancer_backend_set" "free_nlb_backend_set" {
  health_checker {
    protocol = "TCP"
    port     = 10256
  }
  name                     = "free-k8s-backend-set"
  network_load_balancer_id = oci_network_load_balancer_network_load_balancer.free_nlb.id
  policy                   = "FIVE_TUPLE"

  is_preserve_source = false
}

resource "oci_network_load_balancer_backend" "free_nlb_backend" {
  count                    = length(local.active_nodes)
  backend_set_name         = oci_network_load_balancer_backend_set.free_nlb_backend_set.name
  network_load_balancer_id = oci_network_load_balancer_network_load_balancer.free_nlb.id
  port                     = 31600
  target_id                = local.active_nodes[count.index].id
}

resource "oci_network_load_balancer_listener" "free_nlb_listener" {
  default_backend_set_name = oci_network_load_balancer_backend_set.free_nlb_backend_set.name
  name                     = "free-k8s-nlb-listener"
  network_load_balancer_id = oci_network_load_balancer_network_load_balancer.free_nlb.id
  port                     = "80"
  protocol                 = "TCP"
}
First we need to create the Network Load Balancer without anything attached to it. Then there’s a resource in Oracle Cloud for the LB called Backend Set which holds the so called Backends. And a backend is essentially a target for the LB. Since the Kubernetes cluster has 2 nodes, we’ll have 2 backends hence the count attribute for the resource.
The backend set has the health check configuration which points to port 10256 as I said earlier.
And last but not least, we’ll need a listener for the NLB. That’s where the load balancer will listen for traffic from the outside. Since we want a regular HTTP load balancer, I’ll use port 80 there.
One more thing, we’ll also need the IP address of the Network Load Balancer so we can access it. You could look this up on the Oracle Cloud web console but come on, we have Terraform. Let’s open the outputs.tf:
output "free_load_balancer_public_ip" {
    value = [for ip in oci_network_load_balancer_network_load_balancer.free_nlb.ip_addresses : ip if ip.is_public == true]
}
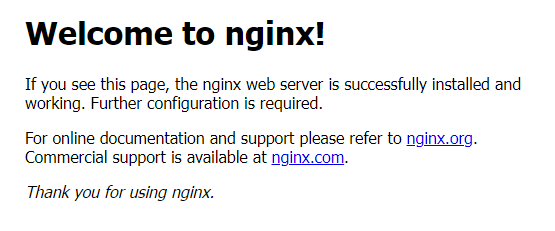
Quick terraform apply and you’re good to go. Let’s open the output IP address in a browser and we should see the following result.
Summary and more to come
That’s how easy it is to set up a fully functioning free Kubernetes cluster on Oracle Cloud and exposing it free of charge to the external world using a Network Load Balancer.
The Terraform scripts can be found on GitHub here.
In the next article I’ll show you how to set up a CI/CD pipeline for a custom app using GitHub Actions. We’ll automatically build the docker image and push it to a free private docker registry and automatically deploy it. Stay tuned.
In the meantime, you can follow me on Twitter and Facebook if you wish.
Thanks!
1. Seems network load balancer can be set in kubernetes deploy config. https://docs.oracle.com/en-us/iaas/Content/ContEng/Tasks/contengcreatingloadbalancer.htm#contengcreatingnetworkloadbalancer_topic_Provisioning_using_an_NLB
2. Add I think can also use load balancer by specify bandwidth to 10?
https://docs.oracle.com/en-us/iaas/Content/ContEng/Tasks/contengcreatingloadbalancer.htm#flexible
I’m new to OCI, maybe I’m wrong..
You are not wrong. 🙂 On paper, this should do the same thing.
Arnold
Tried the item 1 and it worked!
Changed the nginx_service type to LoadBalancer, added the annotations on the metadata section, deleted “target_port” and “node_port” from spec section, removed all the code to provision the loadbalancer, and it worked like a charm!
Thanks Arnold for this article series! Thanks Zizifn for this tip.
I can’t seem to hit the exposed nginx site. After I applied the k8s-infra I got the following output:
free_load_balancer_public_ip = [
{
“ip_address” = “132.145.98.214”
“ip_version” = “IPV4”
“is_public” = true
“reserved_ip” = tolist([])
},
]
The “terraform apply” was successful. I try to hit the IP and the site can’t be reached. Any pointers? Cheers, Dave
Edit: Sorry – forgot to apply the nginx deployment addition to k8s-cluster.tf file. All good now.
Wonderful Dave. Enjoy. 😉
Cheers, Arnold.
Nice article, I will combine this with a Ingress controller to use one Network Load Balancer and multiple backend secured endpoints.
Is the port 10256 anything special? I try to create 2 listeners (one for HTTP, one for HTTPS), and set the HTTPS’ healthcheckport to 10257. But Oracle says all my HTTPS backends are down while all my HTTP backends (the same nodes) are up.
Okay, I’ve set both of my backend sets’ health check port to 10256, and now I can call my sites on both HTTP & HTTPS. I’d be still great to know why port 10256 is special, thanks in advance 🙂
I came across this on the Oracle website (https://www.oracle.com/cloud/networking/load-balancing/pricing/): “Each month, the first Flexible Load Balancer instance is free. NOTE: OCI Flexible Network Load Balancer is offered at no cost”. In my view, this would be preferrable over creating a Layer 4 NLB.
I would also have some clarification on that.
In part 1 of this series the author said “One Flexible Load Balancer is always free with a bandwidth cap of 10 Mbps”.
I absolutely love this. Thanks! But I find that my nodes are tainted as uninitialised when newly created in the pool. Which means that the nginx deployment fails / is pending. Is there a way around this, or do I need to manually untaint them?
Here’s the ouput from kubectl:
k8s-infra % kubectl describe node 10.0.1.254 | grep Taints
Taints: node.cloudprovider.kubernetes.io/uninitialized=true:NoSchedule