- Running a free Kubernetes cluster on Oracle Cloud
- Free Oracle Cloud Kubernetes cluster with Terraform
- Exposing apps from an Oracle Kubernetes cluster using a Network Load Balancer for free
- GitHub Actions CI/CD for Oracle Cloud Kubernetes
New week has come so here we go. I’m gonna show you how I built a free Oracle Cloud Kubernetes cluster using Terraform. Here’s the previous piece of this article series: Running A Free Kubernetes Cluster On Oracle Cloud.
Just to give you a glance on what’s coming in this article and in the upcoming one. We’ll check how to create the necessary resources for running a Kubernetes cluster on Oracle Cloud including the network resources, compute resources, private docker registry, K8S namespaces, how to expose your services to the external world as well as building a simple CICD pipeline for this free cluster using GitHub Actions.
Let’s jump in.
Prerequisites
To start creating the free Kubernetes cluster on Oracle Cloud using Terraform you’ll need the following things:
- An Oracle Cloud account
- A compartment you want the resources to provision in – it can be the root compartment if that’s okay with you
- A user that have permissions to access the necessary resources – can be your root user if you want to
- Optionally an SSH key you want to use to provision your Kubernetes worker nodes and wanna make sure you have some way to access them if needed
- OCI CLI installed
- Terraform CLI installed
- kubectl installed
Also, I have to mention that even though this setup is completely free, you still need to upgrade to a Paid account and there’s a reason. If you stay with the Free account you can only provision a predefined set of resources. You won’t be able to provision NAT gateways and Service gateways which we need for this setup.
However when you register a new Oracle Cloud account, you get some free credits to spend for 30 days and if I remember correctly, that’s enough for this setup but after 30 days, Oracle will decomission the resources that are unavailable in the Free account hence you gotta upgrade to a Paid account anyway. It’s not a big deal to be honest. The upgrade to Paid is completely free although they’ll do a temporary charge of $100 to test whether you have some credit balance – they’ll refund this right away though.
You can upgrade via the Oracle Cloud web console under Billing/Upgrade and Manage Payment.
CLI access configuration
This is gonna be just one way to configure access locally for OCI CLI. If you prefer other methods, feel free to use them and follow the proper documentation on the Oracle Cloud website.
First of all, when you have OCI CLI installed on your machine, execute the following command:
$ oci setup config
This will prompt you all the data it’ll need to generate the proper configuration for you.
The first thing it asks for is the user’s OCID which is an internal ID of your user, kind of similar to AWS’s ARNs. You can look this up by logging into the Oracle Cloud console, go to Identity/Users, select the user you want to use for the CLI access and you’ll find the OCID there.
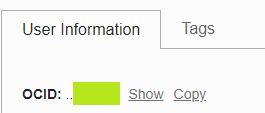
Click on Copy, and there you’ll have the OCID on your clipboard.
Then, the setup will ask for the tenancy OCID. Go to your Profile menu and there it’ll say Tenancy: <something>. Click on that.
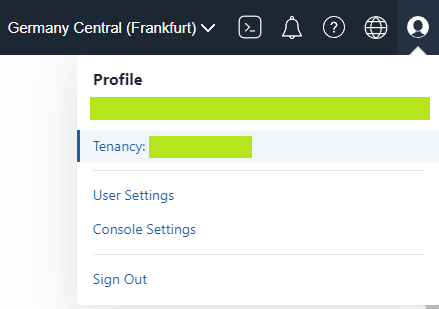
And then, you’ll have the OCID similarly to the user’s OCID.
After that, it’ll ask for the region you want to use for the configuration. Obviously that’s your decision and there’ll be a couple more things like where to put your private key and stuff like that. I’m sure you can figure that out without a guide. 😉
Note: for some reason I wasn’t able to get Terraform work with a passphrase protected private key because there’s some random issue there (similar to this) so I decided to go without a password.
After you’re done with the key generation, there’s one more thing we need to do. Associating the public key that was generated during setup with the user. Go back to your user in the Oracle Cloud web console, click on API keys on the left and click on Add API Key. Upload your public key’s pem file and you’re done.
You can verify that everything is configured properly by running the following command:
$ oci iam compartment list -c <tenancy-ocid>
Where <tenancy-ocid> is your tenancy’s OCID. If you don’t get some authorization error but your compartments’ data, you’re good to go.
Setting up the Terraform variables
Now that the access is settled, let’s talk about the Terraform scripts we’re gonna use to build the free Kubernetes cluster on Oracle Cloud.
Let’s split our Terraform scripts into folders. We’ll have one to set up the OCI infrastructure and a separate one that will create the load balancers and configure a few things in the K8S cluster.
Respectively, create an oci-infra folder. In that, let’s have a variables.tf file where we’ll store the Terraform variables. And then, we’ll have the full infrastructure Terraform file, call it infra.tf. Plus, we’ll want to have some outputs for further things, so let’s create an outputs.tf too.
First things first, let’s create the necessary variables in the variables.tf file:
variable "compartment_id" {
  type        = string
  description = "The compartment to create the resources in"
}

variable "region" {
  type        = string
  description = "The region to provision the resources in"
}

variable "ssh_public_key" {
  type        = string
  description = "The SSH public key to use for connecting to the worker nodes"
}
The compartment_id variable will be the OCID of the compartment we’ll want to use. If you don’t want to complicate your life, you can use the root compartment which you can find by going to the Oracle Cloud web console, into Identity/Compartments.
Region is obvious I’d say. This is the cloud region you want to provision your resources in. For example eu-frankfurt-1 is the region I’ll provision my resources in.
The ssh_public_key variable is self explanatory in my opinion. This is the key I mentioned that you can use in the future to connect to the worker node instances in case you need to manually troubleshoot them.
Alright, let’s configure these variables for Terraform so that we don’t need to provide them upon each execution. I’ll use the TF_VAR_ prefixed environment variables to configure Terraform.
$ export TF_VAR_compartment_id=<your compartment ocid>
$ export TF_VAR_region=<your region>
$ export TF_VAR_ssh_public_key=<your public key>
Network resources for the free Kubernetes cluster
The first thing we need to tell Terraform is which provider to use. There’s one provider for Oracle Cloud called oci.
Into the infra.tf file:
provider "oci" {
  region = var.region
}
This will configure the oci provider for the specified region which is coming from the variable configured.
Then, let’s create the Virtual Cloud Network (VCN):
provider "oci" {
  region = var.region
}

module "vcn" {
  source  = "oracle-terraform-modules/vcn/oci"
  version = "3.1.0"

  compartment_id = var.compartment_id
  region         = var.region

  internet_gateway_route_rules = null
  local_peering_gateways       = null
  nat_gateway_route_rules      = null

  vcn_name      = "free-k8s-vcn"
  vcn_dns_label = "freek8svcn"
  vcn_cidrs     = ["10.0.0.0/16"]

  create_internet_gateway = true
  create_nat_gateway      = true
  create_service_gateway  = true
}
We’ll do everything step by step, so let’s execute this script for now. We gotta initialize the provider and its modules:
$ terraform init
Then apply the infrastructure:
$ terraform apply
Terraform will prompt you to accept the changes after reviewing them. It’ll create the VCN with the necessary configuration. Awesome.
Next up, We need to create the private and public subnets and configure the security rules for them.
Let’s start with the security lists.
// ...previous things are omitted for simplicity

resource "oci_core_security_list" "private_subnet_sl" {
  compartment_id = var.compartment_id
  vcn_id         = module.vcn.vcn_id

  display_name = "free-k8s-private-subnet-sl"

  egress_security_rules {
    stateless        = false
    destination      = "0.0.0.0/0"
    destination_type = "CIDR_BLOCK"
    protocol         = "all"
  }

  ingress_security_rules {
    stateless   = false
    source      = "10.0.0.0/16"
    source_type = "CIDR_BLOCK"
    protocol    = "all"
  }
}
This security list will be applied for the private subnet. It’ll allow traffic to go out anywhere – this will be needed for the Kubernetes nodes to download updates – and it allows traffic for all ports within the range of the VCN – 10.0.0.0/16.
The public subnet security list looks the following:
// ...previous things are omitted for simplicity

resource "oci_core_security_list" "public_subnet_sl" {
  compartment_id = var.compartment_id
  vcn_id         = module.vcn.vcn_id

  display_name = "free-k8s-public-subnet-sl"

  egress_security_rules {
    stateless        = false
    destination      = "0.0.0.0/0"
    destination_type = "CIDR_BLOCK"
    protocol         = "all"
  }

  ingress_security_rules {
    stateless   = false
    source      = "10.0.0.0/16"
    source_type = "CIDR_BLOCK"
    protocol    = "all"
  }

  ingress_security_rules {
    stateless   = false
    source      = "0.0.0.0/0"
    source_type = "CIDR_BLOCK"
    protocol    = "6"
    tcp_options {
      min = 6443
      max = 6443
    }
  }
}
This rule will again allow all traffic to go out to the internet and allow VCN traffic to come in as well as traffic from anywhere on port 6443 TCP. This is going to be important because we’ll use kubectl to manipulate the Kubernetes cluster.
Then, let’s continue with the subnet definitions. First the private subnet:
// ...previous things are omitted for simplicity

resource "oci_core_subnet" "vcn_private_subnet" {
  compartment_id = var.compartment_id
  vcn_id         = module.vcn.vcn_id
  cidr_block     = "10.0.1.0/24"

  route_table_id             = module.vcn.nat_route_id
  security_list_ids          = [oci_core_security_list.private_subnet_sl.id]
  display_name               = "free-k8s-private-subnet"
  prohibit_public_ip_on_vnic = true
}
So the private subnet’s CIDR block is going to be 10.0.1.0/24. Next up with the public subnet:
// ...previous things are omitted for simplicity

resource "oci_core_subnet" "vcn_public_subnet" {
  compartment_id = var.compartment_id
  vcn_id         = module.vcn.vcn_id
  cidr_block     = "10.0.0.0/24"

  route_table_id    = module.vcn.ig_route_id
  security_list_ids = [oci_core_security_list.public_subnet_sl.id]
  display_name      = "free-k8s-public-subnet"
}
And the public subnet is going to be on 10.0.0.0/24.
Now let’s apply these changes with terraform apply.
If you don’t get any error after that, you should have the network setup in place.
Creating the free Kubernetes cluster on Oracle Cloud
So far that was easy. It’s cluster time.
// ...previous things are omitted for simplicity

resource "oci_containerengine_cluster" "k8s_cluster" {
  compartment_id     = var.compartment_id
  kubernetes_version = "v1.21.5"
  name               = "free-k8s-cluster"
  vcn_id             = module.vcn.vcn_id

  endpoint_config {
    is_public_ip_enabled = true
    subnet_id            = oci_core_subnet.vcn_public_subnet.id
  }

  options {
    add_ons {
      is_kubernetes_dashboard_enabled = false
      is_tiller_enabled               = false
    }
    kubernetes_network_config {
      pods_cidr     = "10.244.0.0/16"
      services_cidr = "10.96.0.0/16"
    }
    service_lb_subnet_ids = [oci_core_subnet.vcn_public_subnet.id]
  }
}
This will create the cluster with Kubernetes version v1.21.5, that’s the latest available version at the time of writing this article. I configured the VCN we created for the cluster and allowed a public Kubernetes API endpoint to be created. This means there’ll be a public IP address available on port 6443 where kubectl can interact with the cluster.
If you don’t want this, you can disable it by is_public_ip_enabled = false but then you have to use a bastion host to interact with the cluster from inside the VCN.
In Oracle Cloud, when you create a cluster, it’ll be an empty cluster. You gotta set up a corresponding Node Pool resource which is kind of like a container of what type of compute instances you want to run and how many of them, etc.
When you’re scaling down/up the cluster, you don’t need to manually provision compute nodes and assign them into the cluster. You can scale up/down the Node Pool and it’ll automatically add the nodes to the Kubernetes cluster without further configuration.
The upcoming thing is gonna be a tiny bit more complicated but let me walk you through it.
First we gotta acquire the region’s available domains to put our compute instances into. Obviously it’s possible to use a single AD but why would we do that. If one AD fails, we want the system to fail-over to another AD.
// ...previous things are omitted for simplicity

data "oci_identity_availability_domains" "ads" {
  compartment_id = var.compartment_id
}
With the data directive, we can load data about the resource, in this case oci_identity_availability_domains.
// ...previous things are omitted for simplicity

resource "oci_containerengine_node_pool" "k8s_node_pool" {
  cluster_id         = oci_containerengine_cluster.k8s_cluster.id
  compartment_id     = var.compartment_id
  kubernetes_version = "v1.21.5"
  name               = "free-k8s-node-pool"
  node_config_details {
    placement_configs {
      availability_domain = data.oci_identity_availability_domains.ads.availability_domains[0].name
      subnet_id           = oci_core_subnet.vcn_private_subnet.id
    }
    placement_configs {
      availability_domain = data.oci_identity_availability_domains.ads.availability_domains[1].name
      subnet_id           = oci_core_subnet.vcn_private_subnet.id
    }
    placement_configs {
      availability_domain = data.oci_identity_availability_domains.ads.availability_domains[2].name
      subnet_id           = oci_core_subnet.vcn_private_subnet.id
    }
    size = 2


  }
  node_shape = "VM.Standard.A1.Flex"

  node_shape_config {
    memory_in_gbs = 6
    ocpus         = 1
  }

  node_source_details {
    image_id    = "ocid1.image.oc1.eu-frankfurt-1.aaaaaaaabh7a24rl4qxunwziscawa4k65ar7ktdbbt4yf74hvcp7zipharhq"
    source_type = "image"
  }

  initial_node_labels {
    key   = "name"
    value = "free-k8s-cluster"
  }

  ssh_public_key = var.ssh_public_key
}
Okay so let me try to explain what’s going on here.
In the node_config_details section I specify 2 things. The placement configuration – i.e. where I want my nodes to be provisioned at – and how many nodes I want to provision in this node-pool. Since the eu-frankfurt-1 region has 3 availability domains, I specify 3 placement configuration. If your region has less or more, feel free to add them here.
Then, using the node_shape attribute, I specify that I want an ARM instance from Oracle using the VM.Standard.A1.Flex shape.
The node_shape_config section configures how much memory and OCPUs I want for each node. Since the free tier allows at max 4 ARM instances with an overall 24 GB memory and 4 OCPUs, I chose a 6 GB memory and 1 OCPU setup for each node, meaning that if I want to, I can provision 4 nodes at max for free within this node pool.
The node_source_details section configures the node image. It’s different for every region but you can look it up here: All Oracle Linux 7.x Images. Note, it’s possible to run Oracle Linux 8.x images too.
You need to search for ARM architecture compatible Oracle Linux images so search for the keyword aarch.
For example, the latest ARM version of Oracle Linux 7.x is here: Oracle-Linux-7.9-aarch64-2021.12.08-0.
And now, the image_id that you see in the Terraform script – that ugly OCID – can be found on the page of the image but you gotta scroll down to the bottom. Make sure you choose the right region because it differs for each one.
And last but not least, I configure the SSH public key for the nodes that will be provisioned. Just for maintanence purposes. If you don’t want this, you can remove it.
Getting access to the Kubernetes cluster
I mentioned we’ll need an outputs.tf file too. This is the time we’ll use it. Let’s open it for editing.
We’ll need the cluster’s OCID. You could look this up from the Oracle Cloud web console too but we’re using Terraform so why bother. 🙂
output "k8s-cluster-id" {
  value = oci_containerengine_cluster.k8s_cluster.id
}
Then let’s do a terraform apply and the cluster creation start. At the end it will output the OCID of the cluster.
Outputs:

k8s-cluster-id = "<cluster OCID>"
If you did everything right, after waiting for some time, your cluster should be ready. Note that the cluster nodes are relatively slow to provision because the Oracle Container Engine for Kubernetes is updating them with the proper packages and that takes some time. For me it took around 20 minutes to provision everything. You can monitor the state of the cluster nodes on the Oracle Cloud web console.
And then we’ll create a kubeconfig for kubectl to access the cluster. Let’s execute the following command:
$ oci ce cluster create-kubeconfig --cluster-id <cluster OCID> --file ~/.kube/free-k8s-config --region <region> --token-version 2.0.0 --kube-endpoint PUBLIC_ENDPOINT
This will create a free-k8s-config file in the ~/.kube folder that contains the keys and all the configuration for kubectl to access the cluster.
Let’s set this configuration through the KUBECONFIG environment variable for kubectl.
$ export KUBECONFIG=~/.kube/free-k8s-config
And then let’s try to list the available nodes in the cluster.
$ kubectl get nodes
And if you see the 2 nodes that the node pool has provisioned, you’re done. The cluster is ready.
Summary and source
That’s all. It’s a fully functioning Kubernetes cluster running on Oracle Cloud and it’s completely free.
You can find the full Terraform script on GitHub here.
In the next article I’ll show you how to expose apps to the outside world without costing anything. Stay tuned.
Follow me on Twitter and Facebook if you want to be notified for more.
Splendid explanation
Thanks Vijay. Cheers.
Is there a best practices reason to hard code the image_id rather than create a data resource to lookup the latest image or was it to keep the module simple?
Hi Jim,
The only reason it was done manually is due to simplicity.
Arnold
The line in the file infra.tf:
create_nat_gateway = true
is not possible in Terraform to limits in ‘Always Free’ accounts. The service limit for NAT Gateway is 0.
A workaround would be to use NAT Instance Configuration instead.
Hi,
That’s true and I also mentioned this in the article:
“Also, I have to mention that even though this setup is completely free, you still need to upgrade to a Paid account and there’s a reason. If you stay with the Free account you can only provision a predefined set of resources. You won’t be able to provision NAT gateways and Service gateways which we need for this setup.”
But right after:
“The upgrade to Paid is completely free although they’ll do a temporary charge of $100 to test whether you have some credit balance – they’ll refund this right away though.”
Best,
Arnold
Trying to create a cluster (first one)
Error: 400-LimitExceeded, The cluster limit for this tenancy has been exceeded.
│ Suggestion: Request a service limit increase for this resource Containerengine Cluster
│ Documentation: https://registry.terraform.io/providers/oracle/oci/latest/docs/resources/containerengine_cluster
│ API Reference: https://docs.oracle.com/iaas/api/#/en/containerengine/20180222/Cluster/CreateCluster
│ Request Target: POST https://containerengine.eu-marseille-1.oci.oraclecloud.com/20180222/clusters
│ Provider version: 4.78.0, released on 2022-06-02.
│ Service: Containerengine Cluster
│ Operation Name: CreateCluster
My free Oracle account is currently being updated to a paid one (it takes several hours apparently).
Even if the cluster is a free resource, it may be related…
Since you’ll need a NAT Gateway for the VCN, you need to upgrade to a Paid plan anyway although it’s gonna run free of charge. No worries. 🙂
Best,
Arnold
Event paid versions have a initial limits
For example Oracle cluster engine has a limit of 1. Probably you have already 1 cluster running (check all compartments).
You can check the limits in your dashboard: https://cloud.oracle.com/limits
Also you can request the limit increase on a support page.
You can use one network load balancer and one load balancer in the free tier without upgrading, so you don’t really have to use a nat gateway, do you?
The NAT gateway is needed for the K8S nodes to access the internet, not the other way around. 🙂
confused — by default, each VM has its own internet
why can we not use this route to access the internet
You saved my butt. Best set of blogs I’ve read in a while. Hoo’da thought uncle Larry would be the one to give away free stuff! But hey – great move on his part.
Glad I could help and yeah, it’s a great offer from Oracle.
Cheers, Arnold.
Stupid question, how do you provide your public key? I put it like this:
“`
TF_VAR_ssh_public_key=”—–BEGIN PUBLIC KEY—–
MIIBIjANBgkqhkiG9w0BAQEFAAOCAQ8AMIIBCgKCAQEAz8r+Rein6a/gpybxhJKQ
bZldFSmTghQCr3z9kE3tN6+3ZsIZpWmwWDB4qhpB4J9j/n2XunwOG7ZPaLjv0uOIM3wGd3tQ7CFtV
xo+2oDnFWfBnnEUp52sdVH+O7kklGCHmIR5og6Lopxm6mVEAblr5L0wL063MtYrN
scPwDu8x42mLp15Ffj6rr2jK+C1jMt6eULAq9cQ4JkdAONIPunm5qzpOqKkV3Ta4
MQIDAQAB
—–END PUBLIC KEY—–”
“`
But I got the following error:
“`
Error: 400-InvalidParameter, Invalid sshPublicKey: Provided key is not a valid OpenSSH public key.
“`
Did you ever figure this out? I’m following along and am stuck at this step as well.
Hi thanks for the detailed information. This is awesome! be able to run a kubernetes cluster for personal projects for free!
I read about https://github.com/jpetazzo/ampernetacle but your article is better because it uses the managed service and is more tight coupled with other services for a complete experience.
I’m new to oracle cloud, I will talk about it in a series of youtube videos and posts, documenting what I found, my goal is to have a kubernetes cluster and pipeline running for a microservices project. I will inspire in your documentation and put references to it, although my pipeline will have a different approach using ArgoCD and gitlab. Is there any problem in doing that?
Right now I could create an account, there is some problem in the transaction with oracle.
Best, regards
Glad you liked it.
> Is there any problem in doing that?
Nope, feel free to do so. Enjoy mate.
Cheers.
Arnold
Thank you for sharing this article. I have found it very useful on my journey into all things DevOps.
Great article BTW…what storage does the worker nodes use out of curiosity? As in if you restart the node does it loose its data?
Great article.
You can generate the kubeconfig file as part of the terraform plan, it is a bit cleaner approach in my opinion if we already are using terraform 🙂
resource “null_resource” “kubeconfig” {
provisioner “local-exec” {
command = “oci ce cluster create-kubeconfig –cluster-id ${oci_containerengine_cluster.k8s_cluster.id} –file ${path.module}/config –region ${var.region} –token-version 2.0.0 –kube-endpoint PUBLIC_ENDPOINT”
}
}
Test on 2.9.2023, Both NAT&Service Gateways were created successfully without upgrading the account
Please teach me.
Great article. Helped me a ton!
Would you mind explaining how to set up free storage in OKE?
The issue I’m experiencing is the way storage is provisioned in oracle cloud compute instances. Basically, you get a total of 200GB free storage. Each compute instance you deploy automatically consumes a minimum of 50GB, which means deploying 4 nodes consumes the entire allotment. This is provisioned as “boot storage”.
When you create a persistent volume claim for the cluster, it is provisioned as “block storage”, which again has a minimum capacity of 50GB. So after creating one PVC on a 4-node cluster, we’ve gone over our free-tier storage allotment.
My assumption is that to solve this problem we need to somehow provision the PVC against the existing boot volumes so that extra storage is not allocated.
Is this possible to achieve?
Thanks, and once again, fantastic article!
Very helpful blog post, thanks for sharing!
When creating a cluster through the web portal, you have to check to enable basic cluster instead of enhanced, do you know which, if any of your terraform enables this? I used this post as inspiration for my cluster, but I think I may have missed the part to make the cluster basic and got an enhanced (non-free version) do that and got a 10$ charge (not that much in the grand scheme of things and my own lack of discipline with checking the cost analysis could’ve prevents a lot of it) from the cluster and my clusters load balancers (unrelated to your post: I need to figure out how to setup MetalLB).